Refretting: Guitar Fret Replacement
What Are Frets?
The guitar belongs to the family of “fretted instruments” which also includes Banjos, Mandolins, and Ukuleles. An overly simplified definition of these instruments is that they are a series of strings that have been suspended above a set of carefully positioned metal bars that have been inserted into the fingerboard. While playing, one hand pushes the strings into contact with the bars in order to alter the pitch of the note that is produced when the string is plucked or strummed with the opposite hand. The name given to the these pieces of metal is “frets”.
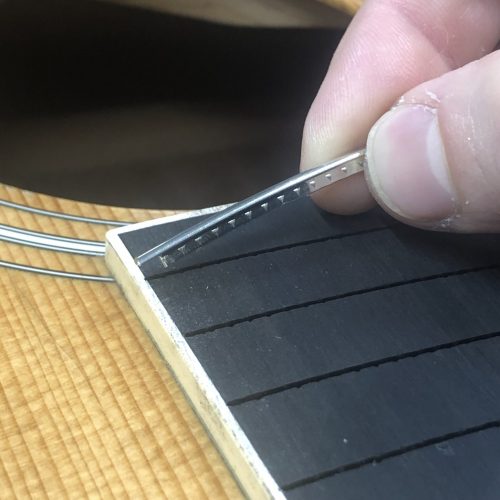
Frets are typically pressed or tapped into a channel that has been cut into the fingerboard. The portion of the fret that sits in this groove is called the tang and it has small bumps along it, known as barbs, that help to hold the fret in position. The portion that sits on top of the board and contacts the strings is known as the crown.
Fret Materials
An ideal fret material must be both pliable enough to facilitate the delicate work of installation, yet hard enough to resist years of having metal strings pressed and slid across their surface. There are a few metal alloys that are popular for the job.
A Nickel-silver alloy is the most widely used fret material. This term is misleading though, since the metal does not actually contain any silver. Instead, it is comprised mostly of Copper, Nickel, and Zinc. Nickel-silver frets are favored by most makers as the best combination between workability during installation and durability in use.
Stainless-steel frets have grown in popularity in recent years, particularly among electric guitar designers. While stainless steel is more expensive and difficult to work with, it may offer added durability for certain players.
Another less common choice are brass alloys, containing Copper, Zinc, and sometimes Tin. These frets have a gold-like color and have been most widely used by the German makers, Warwick and Hagstrom. Since it contains no nickel, it is considered hypoallergenic and is a great option for those with a nickel allergy.
What is a Refret and When Do I Need One?
With regular maintenance, frets are typically able to provide years of service. However, a well used instrument will likely require at least one refret over the course of its life.
As with any instance where metal touches metal, wear will occur. For this reason, the guitar should be restrung frequently to replace worn strings. Worn frets reveal themselves more slowly, showing up as flat spots or grooves underneath where the string lies.
Oftentimes a fret level, crown, and polish can restore the frets to a more usable state. But, since that procedure involves removing a bit of the overall fret height, once worn too low, replacement is required.
Since guitar necks are typically made from wood, their stability relies both the quality of the materials used in their construction and the user’s efforts to maintain stable humidity control for their instrument.
Should the neck show signs that it has warped or twisted in a manner that prevent proper setup, removing the frets allows us the ability to plane the fingerboard to straighten these imperfections before new frets are installed.
As previously discussed, frets are available in an assortment of materials and sizes. Sometimes players have a strong preference for a certain type of wire and are willing to take on the expense of regretting an otherwise healthy instrument in order to change the specs to fit their needs.
Performing A Refret on a Bound Guitar Neck
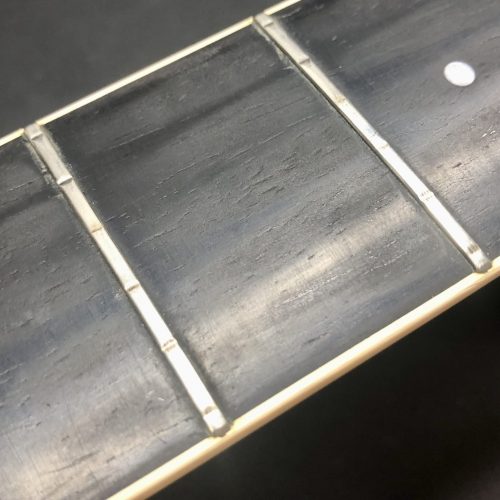
After years of steady use, the frets in this Taylor guitar were well worn. Having already been leveled once or twice before, there simply wasn’t much material left; They had to be replaced.
Fret Removal
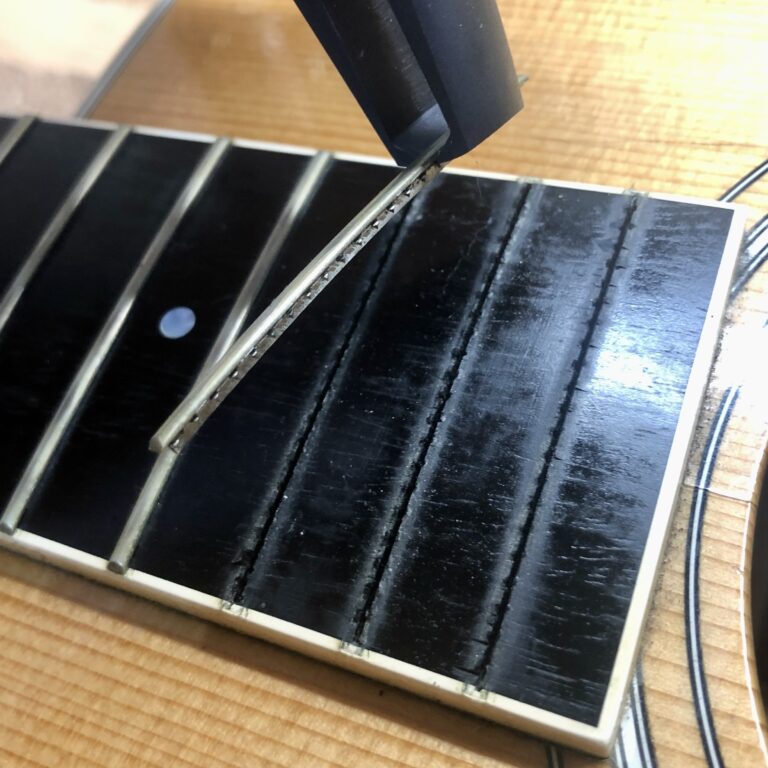
The first step in regretting a guitar is removing the old frets. After conditioning the fretboard to minimize chipping, the frets are carefully removed with a set of specially designed pliers.
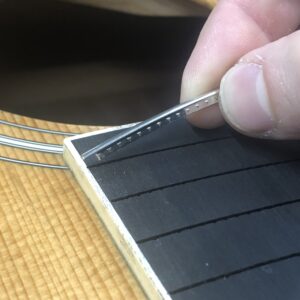
In the photo, the fret barbs are visible along the side of the fret. If glue has been used to secure the frets, heat may be applied to soften it and allow for removal.
Preparing The Fingerboard
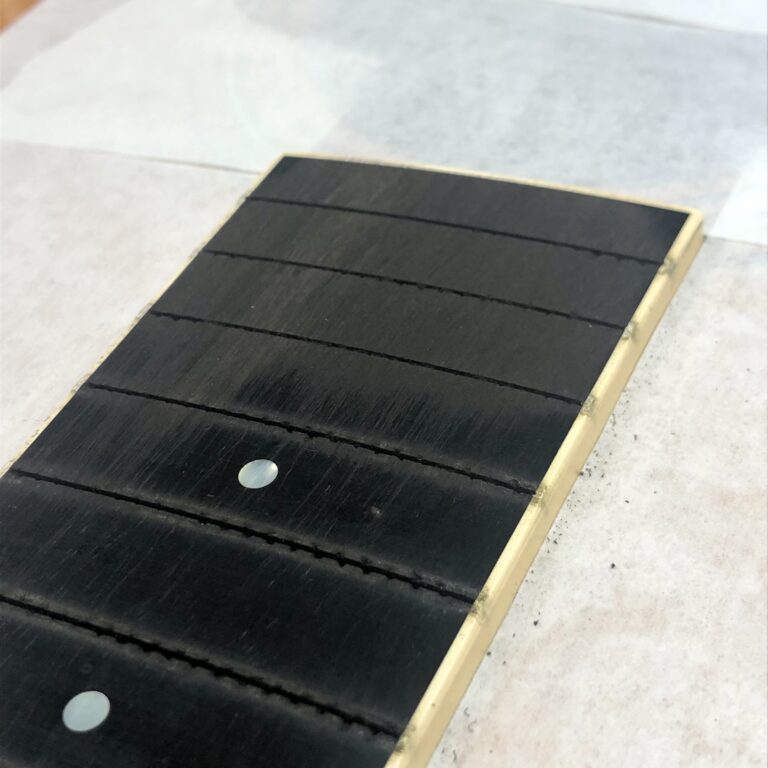
Once the frets are removed, we set about planing the fingerboard to ensure that the neck will be straight and true. This is typically done with sandpaper applied to a long bar metal bar.
As you can see by the in-progress photo, this fingerboard was not perfectly straight. The sanding beam was hitting the end of the board, but had not yet touched the portion of the board shown in the bottom left corner of the photo. More sanding is needed to remove any imperfections in the wood.
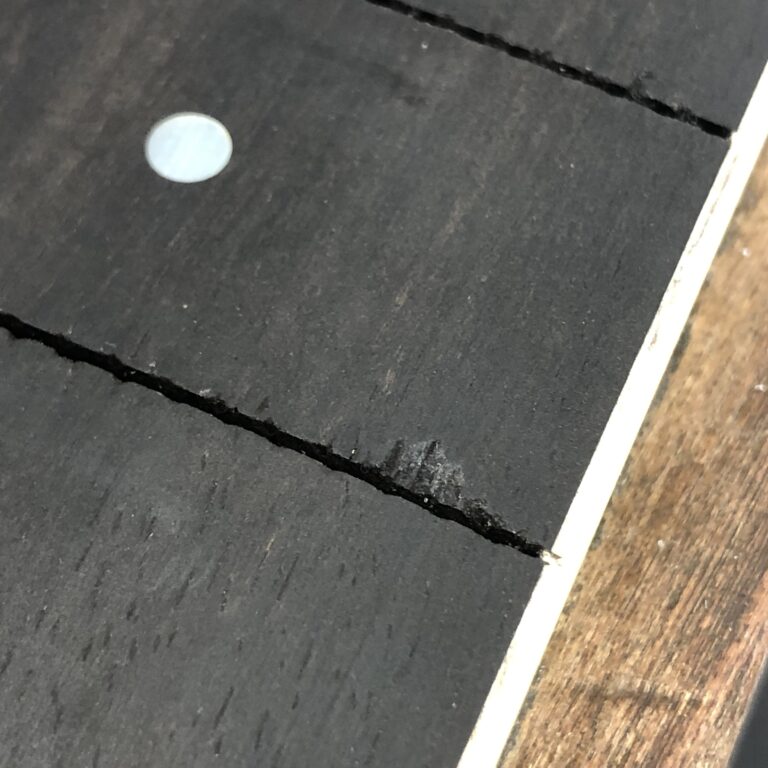
Every re-fret presents its own challenges. Due to the hard and brittle nature of the wood, when working with Ebony, such as is featured in this example, some amount of chipping is not uncommon.
This photo shows where a small piece of wood chipped off the side of the fret slot. This must be repaired before moving on.
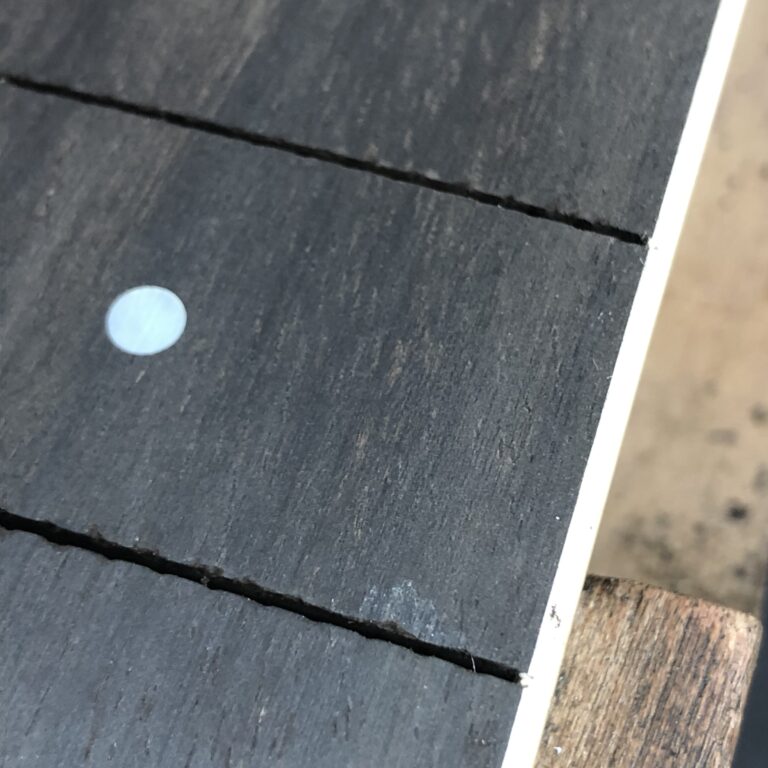
After the initial prepping of the fingerboard, we fill any chips with ebony dust and cyanoacrylate glue. This technique can also help minimize any voids or depressions elsewhere on the board that occasionally result from years of fingernails pressing against the wood.
Once the frets are installed, this repair should be largely invisible.
If the new frets are to be seated properly, it is important to make sure that the fret slots are properly sized to match the fret wire and are free of debris. This is delicate work as it must be done without damaging the surrounding area or accidentally enlarging the size of the slot in a way that would prevent the fret from seating properly later.
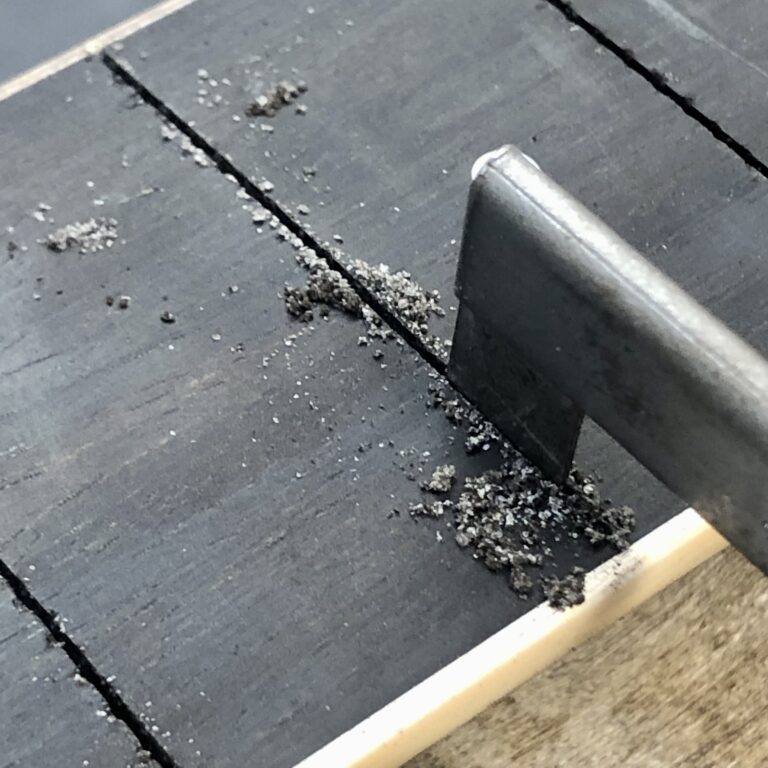
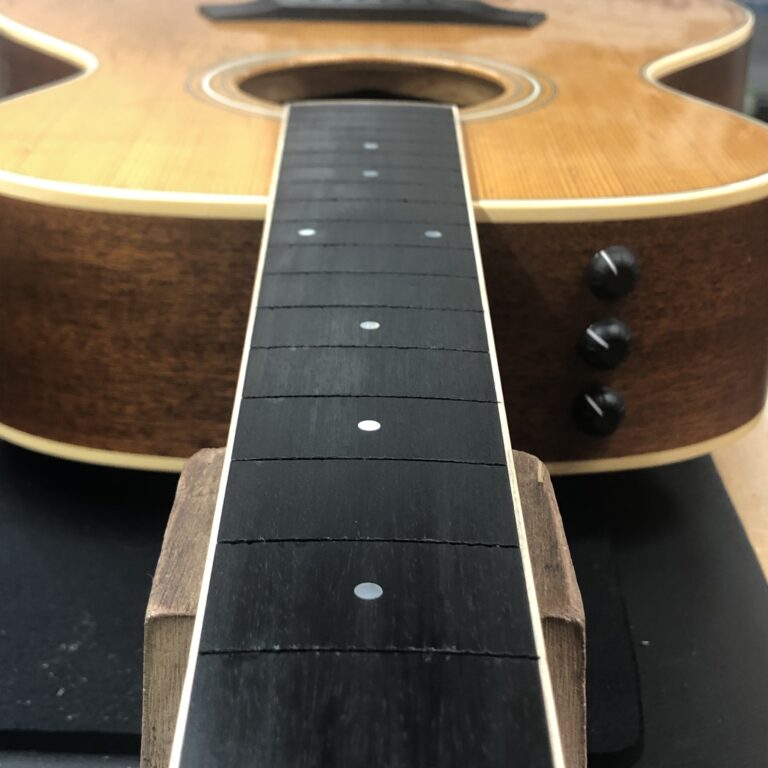
Prepping the board is meticulous and time consuming work, but it is essential that it be done correctly before moving on to fret installation.
The adjoining photo shows a board that is prepped and ready for fret installation.
Installing New Frets
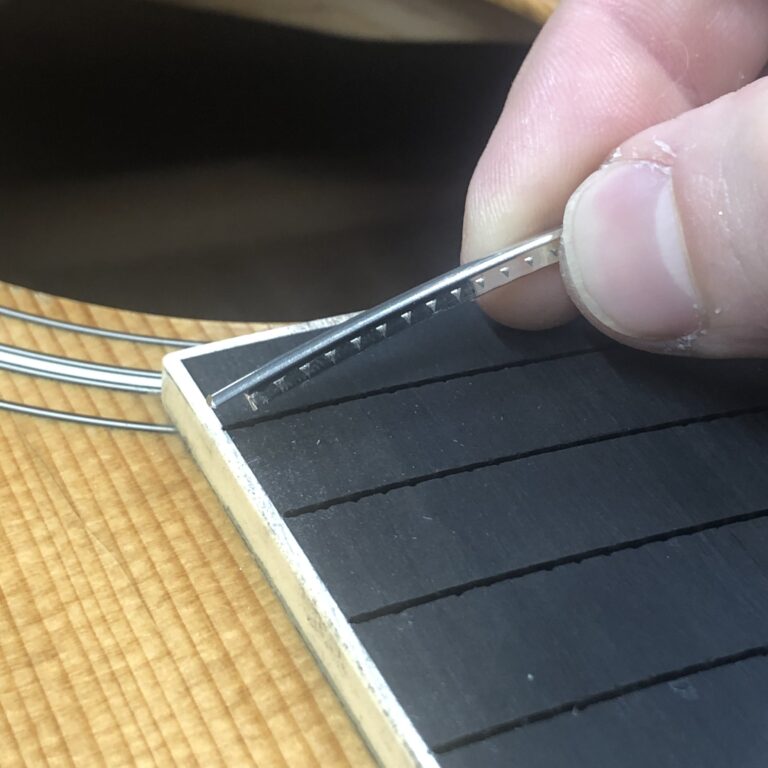
Since the fretboard tapers along its length, frets must be prepared individually to fit each slot. Each must be cleaned, radiused and cut to size.
Since this instrument’s fingerboard is bound on the sides, the frets must also be undercut prior to installation. The photo shows that the tang (bottom portion of the fret) has been removed near the edge; This allows the crown of the fret to extend over the binding.
Once the fret is cut and shaped, it is ready to be installed. This is done either by tapping it into place using a fretting hammer or pressing it into position with the aid of a special clamp and caul system. Both methods may be performed in concert with one another on a given job.
Though opinions vary on this, I generally prefer to use a bit of cyanoacrylate glue to help secure the frets in the slots. This helps reinforce the mechanical bond between the fret tang and the slot; It prevents the fret from unseating itself and prevents “dead spots” on the neck.

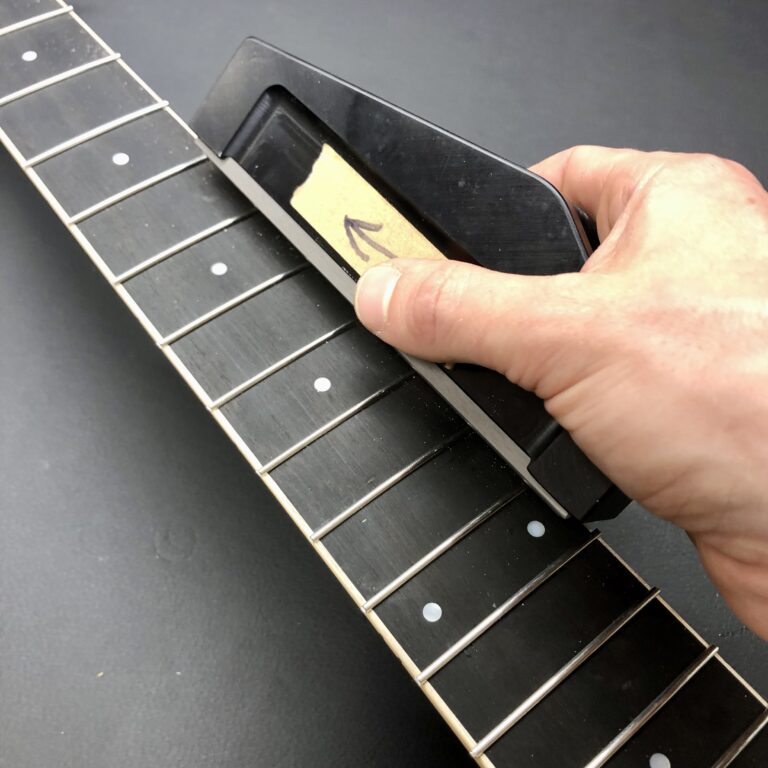
Once installed the fret ends must be dressed and the tops leveled, crowned, and polished. We have covered both of these tasks in detail in other articles, so please click the links for more information on this process.
When properly performed, a refret can breath new life into a guitar.

Refretting A Maple Fingerboard

Refretting a guitar neck that has a maple fingerboard presents a special challenge. Whereas other common fingerboard materials like Rosewood or Ebony are typically not covered with a protective finish, maple usually is.
Oftentimes, the finish will require touchup or must be completely redone as part of the job. As a result of the added attention, maple fingerboard instruments may be more complicated, time consuming, and expensive to refret.
To complicate things further, on well used instruments, the finish will often begin to age and degrade over time. While this may sound like a bad thing, the look that it produces can be quite aesthetically pleasing to some players. So much so that should a refret will require removing the finish from the fingerboard and respraying it, the client may request that the new finish be reliced to more closely resemble the previous.
With this in mind, when regretting a maple fingerboard guitar like an old Strat or tele, providing the neck does not have any substantial twists that need to be corrected, we sometimes elect not to plane the fingerboard in the manner described above! This allows us to retain the original “wear” patterns on the fingerboard and simply replace the worn frets.
When fretting a board without planning the neck, we must be extra careful to keep the board as stable as possible during the process. One way to do this is to avoid pulling all of the frets at once, but instead pull every other. Since the fret tangs add stiffness to the neck, this can help keep it stable as we refret. Once the first half of the frets are removed, we can pull the others and continue.
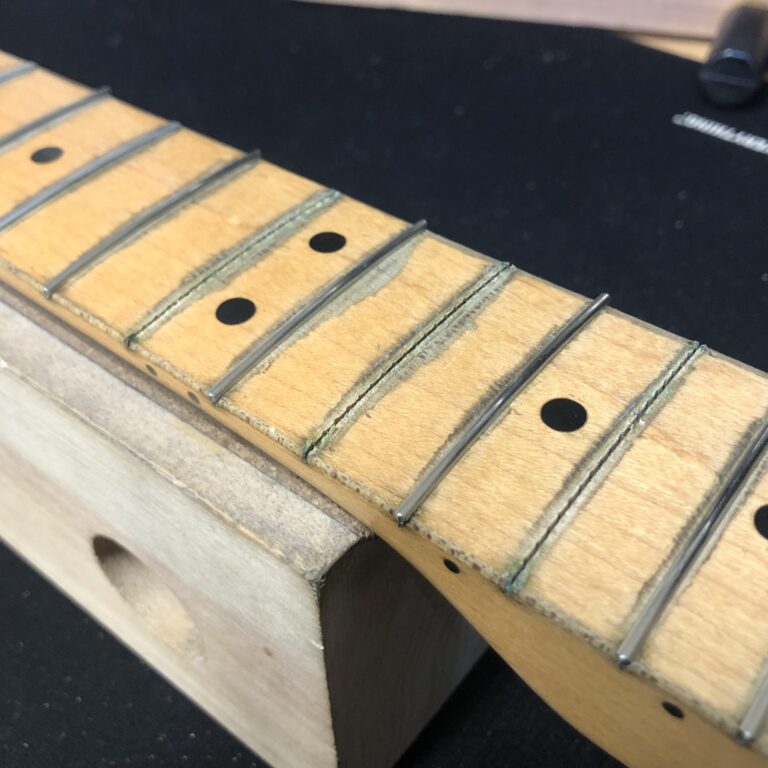
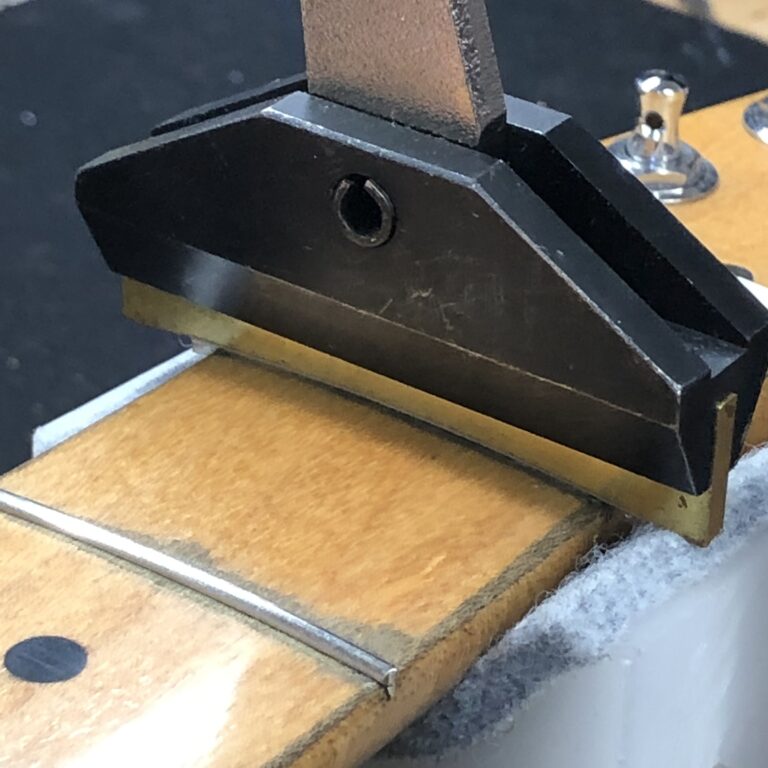
Shown here is an example of using a fret press to seat a fret into the fingerboard. A caul matching the radius of the fingerboard is installed into the clamp. This caul is then positioned over the fret before applying pressure to press the tang into the fret slot.
Since this board is not bound, undercutting the frets is not necessary. We simply cut the frets to be slightly oversized and then file the edges smooth during the dressing and crowning process.
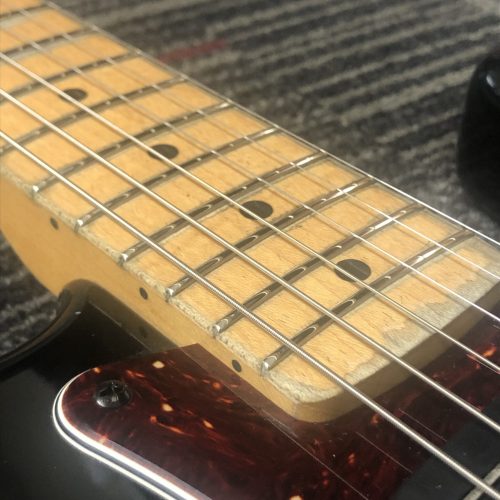
When finished, the board still shows its age, but the frets feel good as new!

Erik Salomon - Calico Guitarworks Owner / Head Technician
Tech Talk articles are part of an ongoing effort to provide clear and detailed answers to common questions about guitar maintenance, modifications, and repairs.
While not intended as a step-by-step guide to servicing your own instrument, we hope that you will find value in the information provided.

Great Repairs Start With The Right Parts
Many of the parts mentioned in our blogs are available for purchase at:
GuitarRepairParts.com
Enter the code "TechTalk10" at checkout for 10% off your first order.
About Calico Guitarworks
Calico Guitarworks is the area’s premier destination for fretted musical instrument care and maintenance. Owned and managed by Erik Salomon, the shop is dedicated to providing quick, honest and reliable service. The staff at Calico Guitarworks has a combined 25+ years of professional guitar repair experience. Sharing the knowledge that we accumulate in this focused pursuit is at the core of what we do. Learn more About Calico Guitarworks, explore our Frequently Asked Questions, or Contact us with a specific request.


