Guitar Restringing
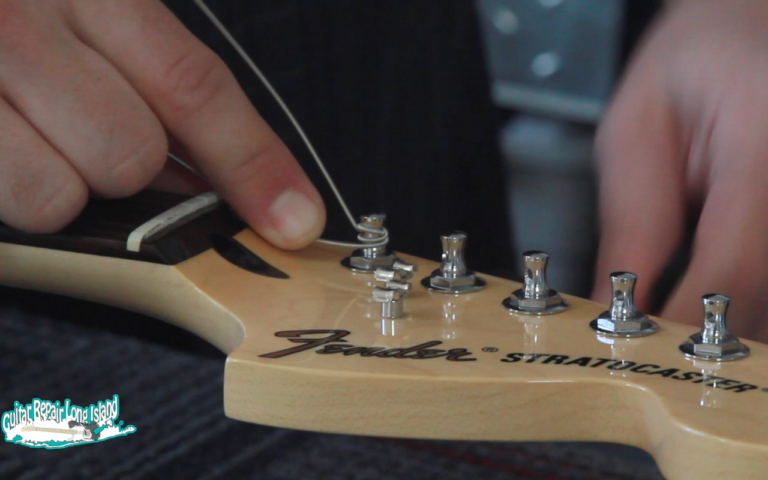
Strings are perhaps the single most important part of a guitar; Every other part of the instrument is designed to support or enhance the vibration produced by a picked or plucked string. A good set of strings is the first step in maintaining the best sound from your instrument.
Put another way, the guitar string is not unlike fuel to a car; Without them the guitar doesn’t go, they are consumed by the process, and they require regular replacement! As such, basic restringing is a necessary skill that we strongly encourage guitar players to learn how to do for themselves. In our shop, a restring is done as part of a more complete maintenance service called a setup.
Why Do I Need To Change My Strings?
Old Strings
- Poor intonation
- Prone to breakage
- More difficult to play
- May cause "string buzz"
- Tone loss ("dead" sounding)
New Strings
- Improved tuning stability
- More reliable
- Bend and slide easier
- May reduce "string buzz"
- Restores crisp and resonant tone
How Often Should I Change My Strings?
Guitar strings are an item that should be replaced regularly. Just how regularly is ideal depends on factors such as string type, usage, the players personal body chemistry (how oily ones skin is), and the circumstances under which the instrument is to be used.
Professional players typically replace their strings before every gig. Hobbyist players have a higher degree of variation, with more demanding players and semi-professionals changing every 1-2 weeks, while casual players may go as long as 1-3 months in-between restrings.
In most cases, if your strings are more than a few months old, the tone, intonation, and playability of the instrument will be noticeably improved by a new set. No matter how long it has been since they were changed, if running a finger along the underside of the string (the side that contacts the fret) reveals divots or a gunky build up, it is time for new strings!
Tips To Extend String Life
- Wash your hands before playing
- Wipe down the strings with a cloth after playing
- Try restringing using a "coated" string set
- Be conscious not to apply too much pressure when fretting or using a capo
Basic Tools For Changing Strings
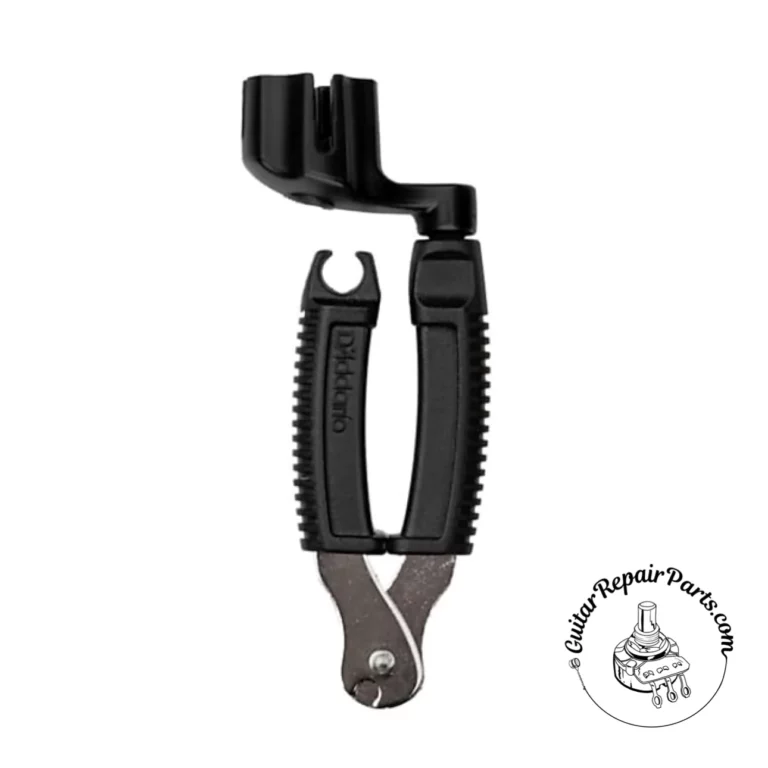
D'Addario Pro Winder Multi-Tool
The D’Addario Pro-Winder is a high-quality peg winder with a built-in clipper, bridge pin puller and string stretcher. It is designed to fit virtually all guitars, banjos, and mandolins.
Ergonomically designed with durable hardened steel wire cutters, the Pro-Winder is the ultimate all-in-one restringing tool. Keep one in every case!
D'Addario Eclipse Tuner
The Eclipse chromatic clip-on tuner offers fast, accurate chromatic tuning at an affordable price. The tuner features a full color vertical display, auto power-off, and pitch calibration in a discreet, compact design.
The multi-swivel action allows for the perfect viewing angle and can be mounted in front of or behind the headstock on right- and left-handed instruments.
Restringing a Fender Stratocaster Guitar
The following tutorial outlines the steps involved in restringing a fender Stratocaster or other similarly styled tremolo equipped guitar. It can be used as a general overview for other instruments as many of the same tools and principles are still applicable.
Tips For Guitars With Locking Tremolos
Guitars with locking tremolos, such as Floyd Rose, Kahler, or Ibanez’s Edge tremolos, have a few unique aspects to their restringing.
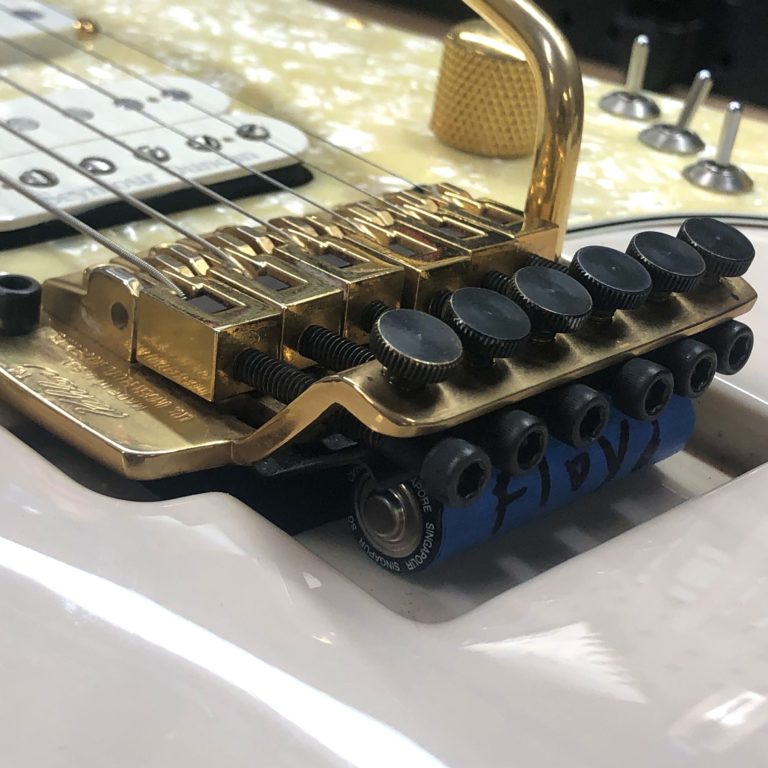
These instruments often have a recess carved into the top of the instrument to allow a further range of movement when using the whammy bar.
If the instrument has a recess, to prevent the bridge from falling into the body, or scratching the top, we like to support it before loosening string tension. There is no need to get too fancy here; In the photo we are using an old AA battery that has been wrapped in tape and placed underneath, inside the recess.
An allen key is required both to unlock the locking nut and free the string from the bridges saddle insert. Most instruments will use a 3mm metric allen key for both screws; Kahler systems use a 9/64″ SAE allen key.
After inserting the key, turn to the left to loosen the locking nut. You may now unwind the string using the tuner as on a standard guitar. After loosening the string, use the allen key on the bridge, as shown in the photo, to release the string from the saddle insert.
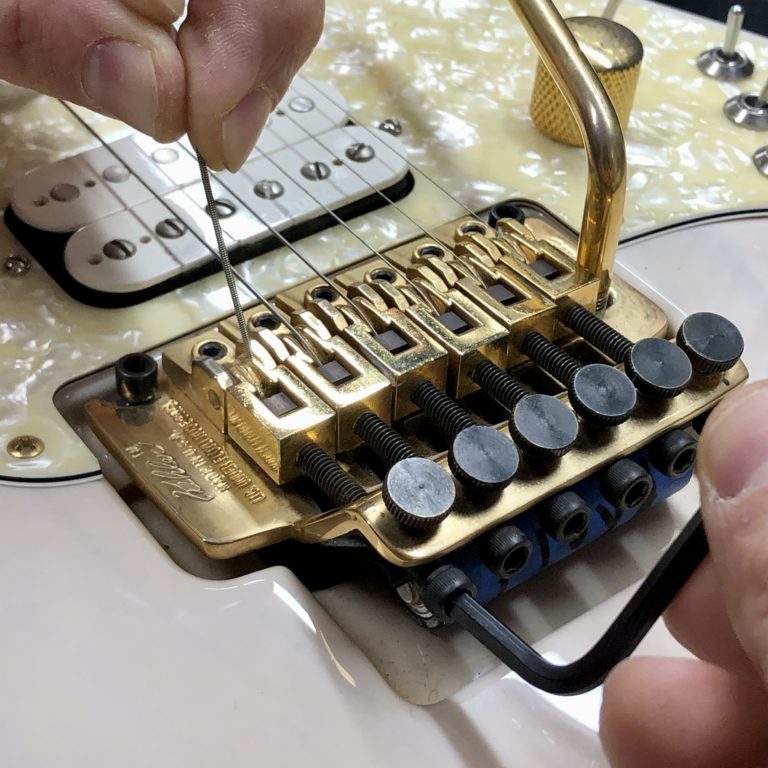
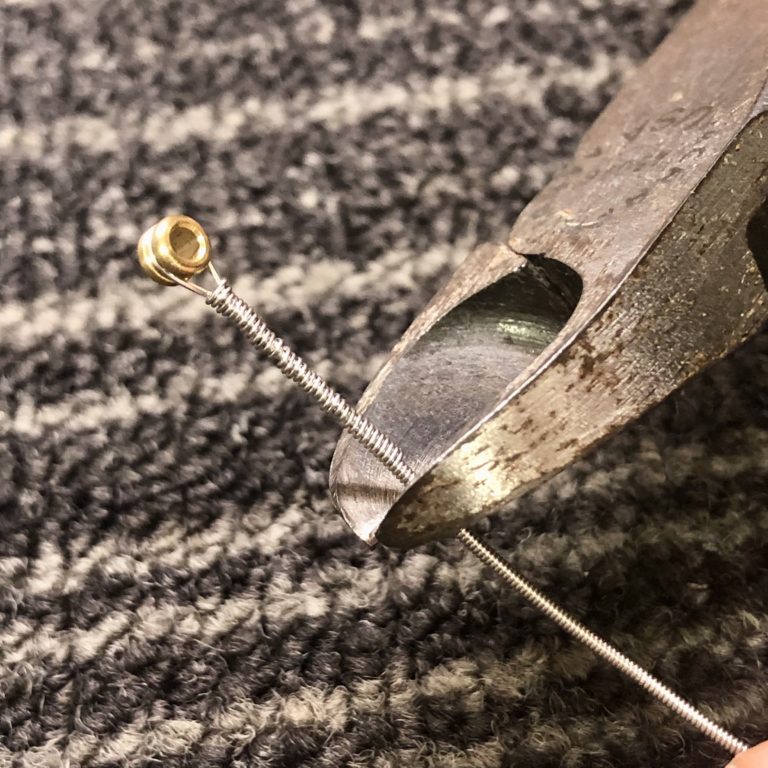
Upon removing the string, you will notice that it does not have a ball-end such as has been included with your replacement string set. Using the cutter included with your string winding tool, or a pair of diagonal cutters as shown in the photo, simply snip off the ball end and the over wrapped portion of wire that attaches it to the string.
Once the ball has been removed, simply stick the string into the bridge, wedged between the block and the front of the saddle, and tighten in place using the allen key.
The string should be tightened until it is fairly snug; Stop once considerable pressure is required to tighten further, as overzealous tightening may damage the hardware. The string can then be wound around the tuner as normal.
Restringing a Bigsby Vibrato
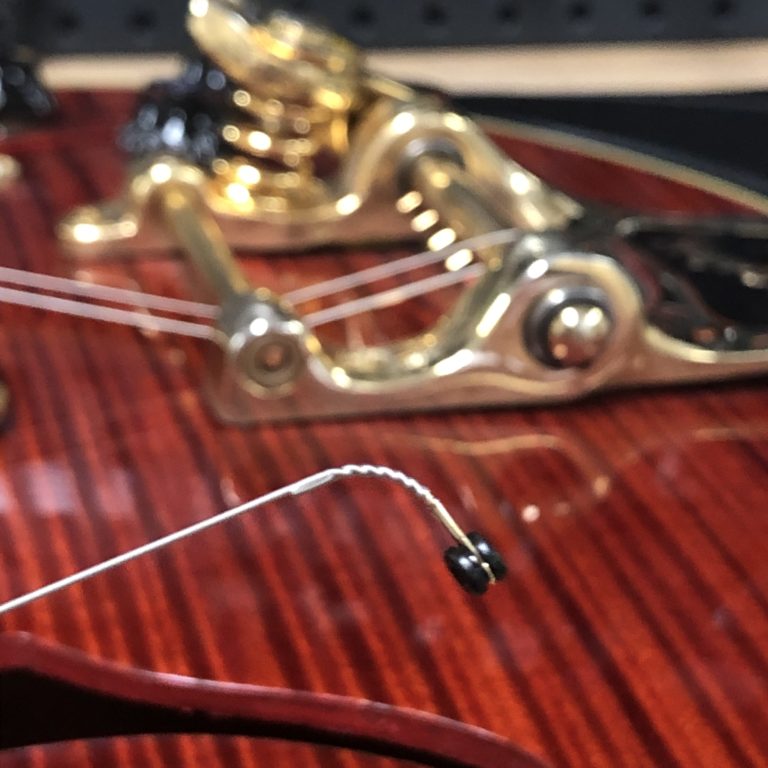
When it comes to Bigsby vibratos, it can be helpful to put a slight bend near the ball end of the string to help position it onto the tailpiece. (We typically use the rounded shaft of a #3 Phillips head screwdriver for this task) The bend will help hold the string in place once it has been installed onto the pegged roller at the base of the bridge.
If your guitars Bigsby has an additional roller bar, be sure to rout the strings underneath it, as shown in the background of the photo, to get the proper string position.
We find that it can be particularly finicky to position the outer strings (1 and 6) because of their proximity to the sides of the baseplate. As such, you may find it easier to do these strings first so as to have a bit more room to maneuver without the added obstacle of the previously installed strings.
Common Restringing Mistakes
Proper winding of a guitar string around a standard tuning machine starts near the top of the tuner and wraps about 3 times around, with the string leaving off the tuner toward the bottom (closer to the headstock).
It is also important to make sure the string is wound in the right direction around the tuner. (Typically clockwise for bass side mounted tuners and counterclockwise for treble side mount).
Incorrect winding around the tuner can cause buzzing or tuning stability issues.
A well setup instrument is calibrated to accept strings of a specific gauge and play in a specific tuning. Changing string gauges or using a tuning other than standard tuning is call for a setup.
Occasionally clients will bring in an instrument that they had begun to restring themselves but stopped because they noticed that the instrument wasn’t playing right. Usually this is due to the fact that the client removed all of the strings at once and is now testing just a single replaced string.
Remember that, since the instrument is setup to resist the tension of a full set of strings, it is completely normal for it not to sound right with only one string on it. There isn’t enough tension on the instrument yet; If everything looks right with the string that you replaced, keep going! The instrument will likely sound much better once you have finished installing the complete set.

Erik Salomon - Calico Guitarworks Owner / Head Technician
Tech Talk articles are part of an ongoing effort to provide clear and detailed answers to common questions about guitar maintenance, modifications, and repairs.
While not intended as a step-by-step guide to servicing your own instrument, we hope that you will find value in the information provided.

Great Repairs Start With The Right Parts
Many of the parts mentioned in our blogs are available for purchase at:
GuitarRepairParts.com
Enter the code "TechTalk10" at checkout for 10% off your first order.
About Calico Guitarworks
Calico Guitarworks is the area’s premier destination for fretted musical instrument care and maintenance. Owned and managed by Erik Salomon, the shop is dedicated to providing quick, honest and reliable service. The staff at Calico Guitarworks has a combined 25+ years of professional guitar repair experience. Sharing the knowledge that we accumulate in this focused pursuit is at the core of what we do. Learn more About Calico Guitarworks, explore our Frequently Asked Questions, or Contact us with a specific request.

