Installing A Pre-slotted String Nut
What are Pre-slotted String Nuts?
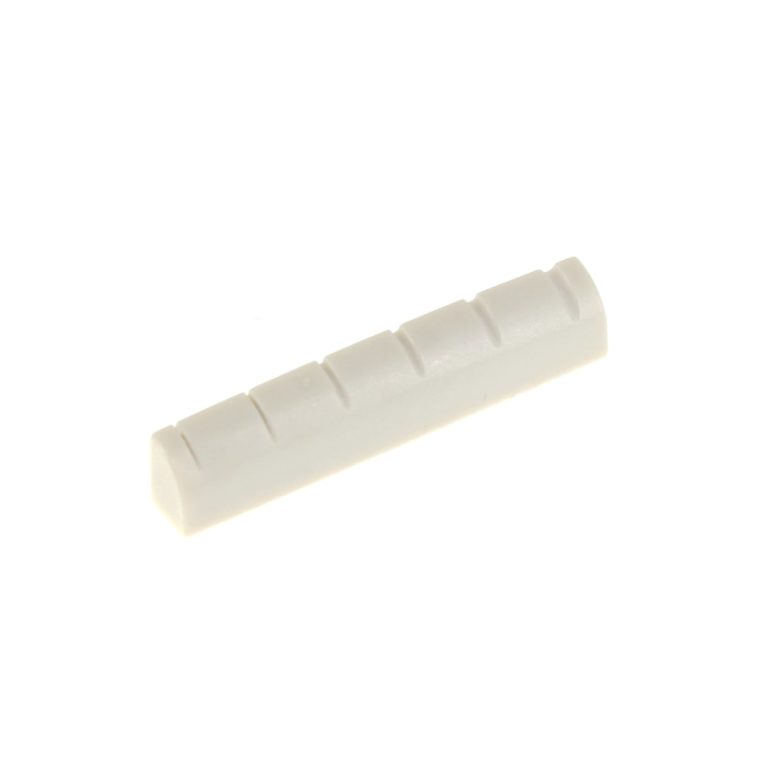
A Pre-slotted string nut is one that has been manufactured so that the bulk of preliminary shaping and slotting has been done. This shortcuts some of the early steps that are required when hand-cutting a nut from a blank.
The benefit of these products is clear; They are a time saver for our busy shop and are more cost effective for our clients. We carry a variety that have been designed to fit popular instruments from brands like Fender, Gibson, Taylor, and Martin.
Unfortunately, pre-slotted nuts are not right for every job. In practice, guitar string nuts come in many different shapes, sizes, string spacings, and can be made from a host of different materials. Pre-slotted nuts however are most commonly manufactured from either animal bone or Graph Tech’s synthetic Tusq material, and are designed to fit the specs of the most popular instrument styles. A pre-slotted option may not be available If the instrument in question is of a lesser known brand, or if an alternate material, or string spacing, is required.
Installing a Pre-slotted String Nut
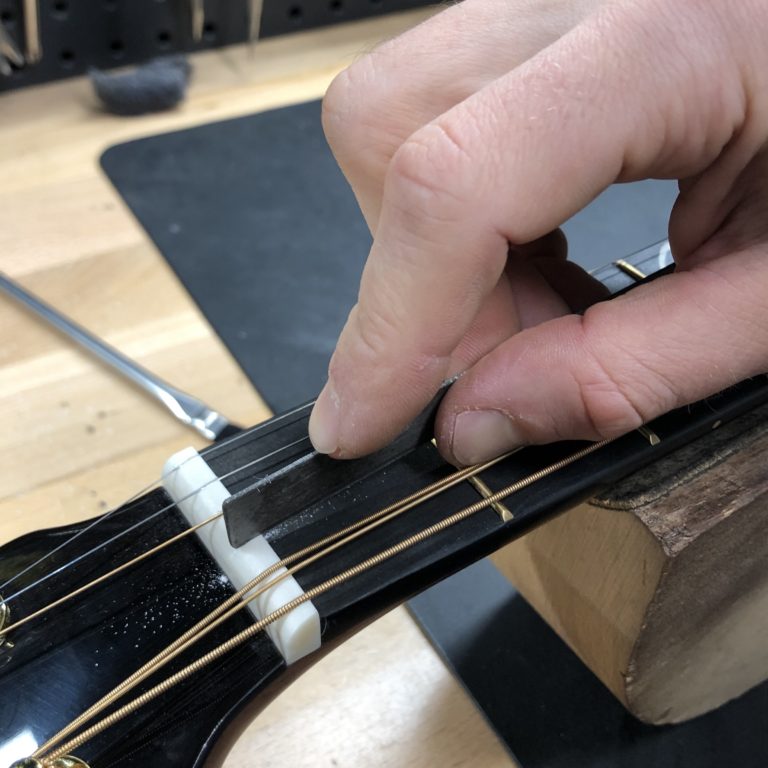
Unfortunately, even pre-slotted nuts rarely drop right in. Specialty tools, files, and a keen eye are still required for a proper fit. It takes practice to do it well. In shop it seems that we frequently find ourselves being tagged in to rescue a D.I.Y. nut installation that has gone awry. Don’t be lured in by the finished appearance, professional installation is strongly recommended. Below is an outline of the steps involved when installing a pre-slotted string nut.
Oversized String Slots: More Buzz, Less tone
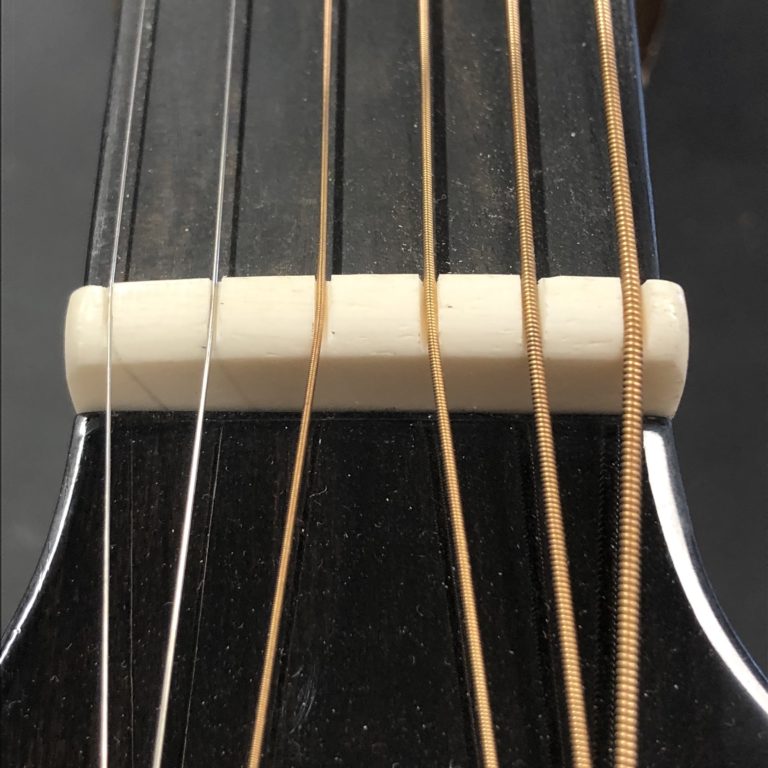
The bone nut pictured has some issues. Each of the nut slots is significantly wider than the width of the string it supports. (zoom in on the 3rd string for the most obvious example)
There are three common reasons this might be the case. (1) The client has changed to a lighter gauge of strings than the instrument was initially setup for. (2) Wear and tear from years of use. OR (3) The misplaced best efforts of a previous repairman.
Nut Removal
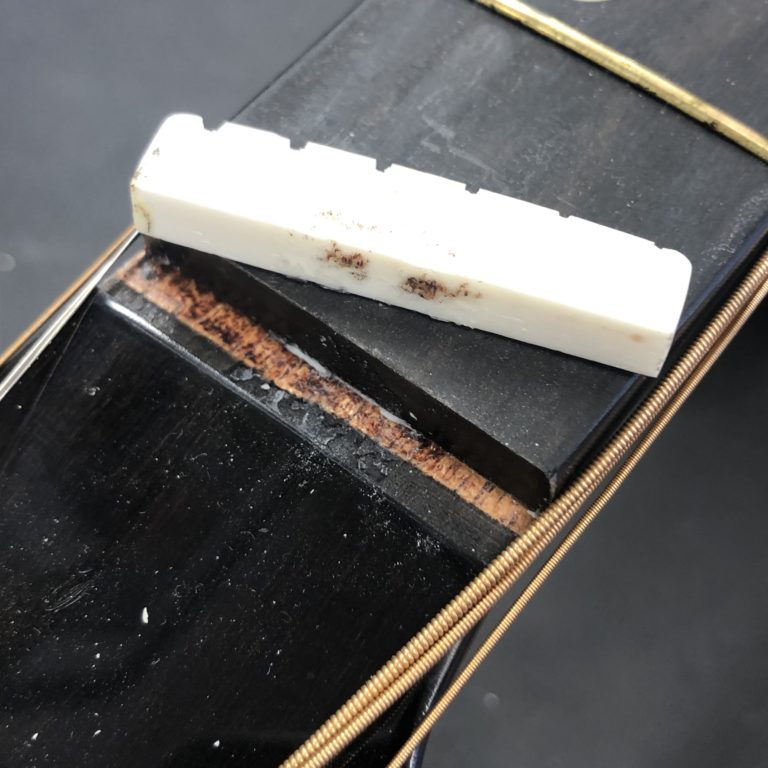
The nut on this instrument had been secured with a fairly large amount of super glue on both the bottom and front side edges. While we can attest to the fact that this method left the nut quite secure, in our experience, super glue makes a nut much harder, time consuming, and potentially damaging to remove.
Fortunately, after a brief battle, we were able to remove this one without too much hassle.
Cleaning The Nut Slot
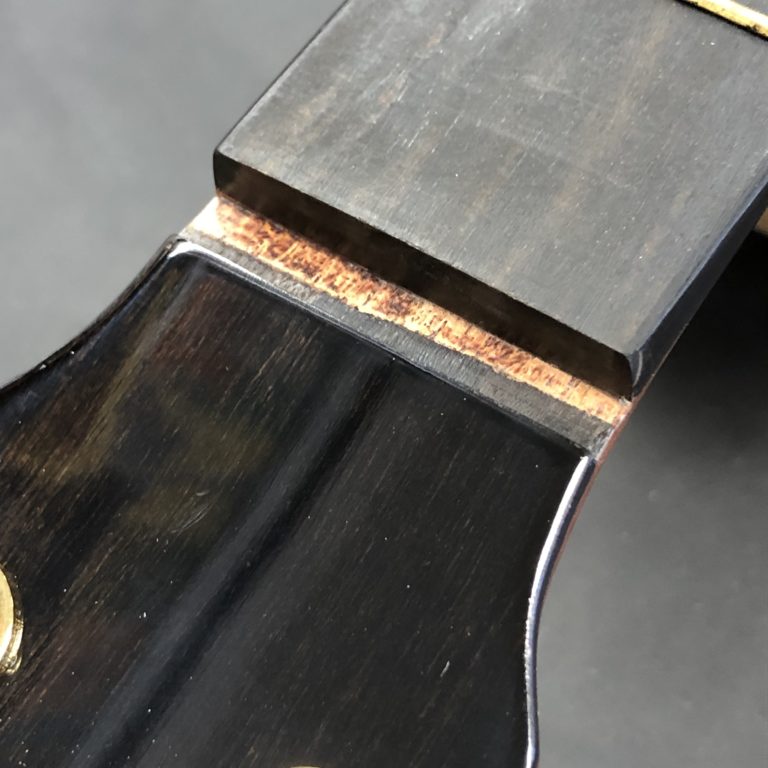
After some work with chisels and files, we have removed the glue residue and fragments of the old nut.
Confident that the nut slot is clean and square, we are ready to begin fitting the new nut.
Choosing A Replacement Nut
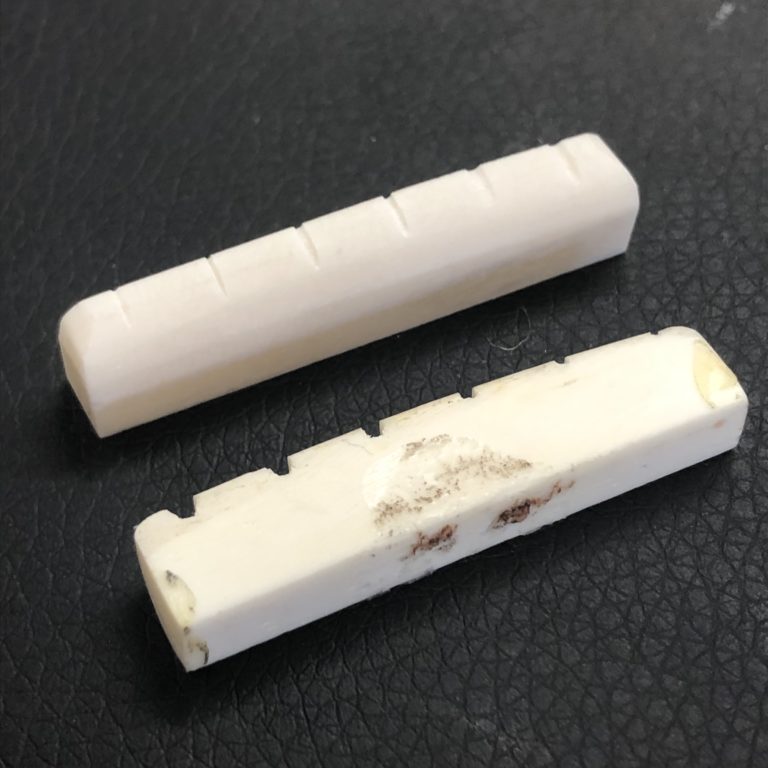
Since the original nut and saddle were both made from animal bone, we elected to stick with the same material for the replacement nut.
Fortunately, amongst our collection of parts, we located a replacement nut that has very similar specs to the original. This saves us a few minutes of prep time. Though the two nuts look very similar, the replacement is slightly oversized and requires fitting to the slot.
Fitting A Replacement Nut
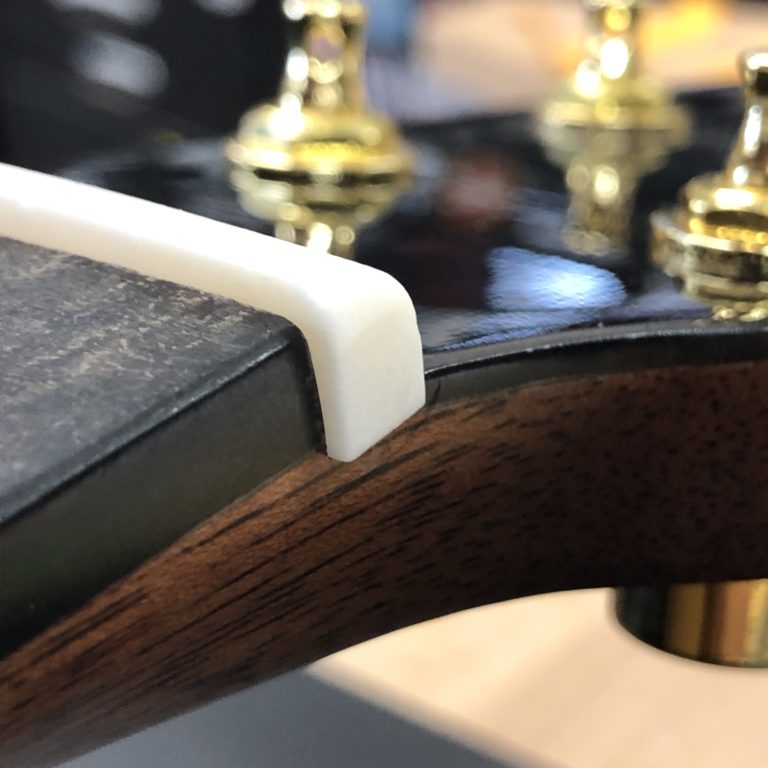
Using the original nut, a measuring tool called a caliper, and the slot as our guide, we begin fitting the new nut.
In the photo, we are part of the way through fitting the nut. We have gotten the width right so that the nut can fit comfortable against the bottom of the slot. But, you can see that there is still some work to be done so that the ends of the nut will sit flush with side of the neck.
Slotting A Replacement Nut
Gluing A Replacement Nut
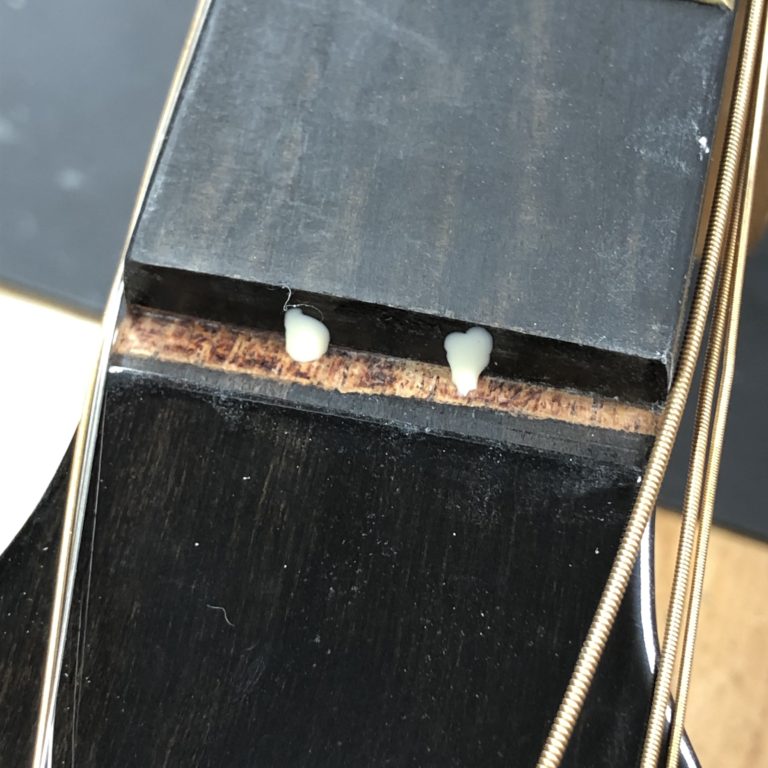
After dressing and polishing, the nut is ready for installation. In lieu of the super glue that was used originally, we elected to use a couple of drops of wood glue. Though a weaker bond, it should be sufficient to hold the nut in place and will make removal far easier should it be required down the road.
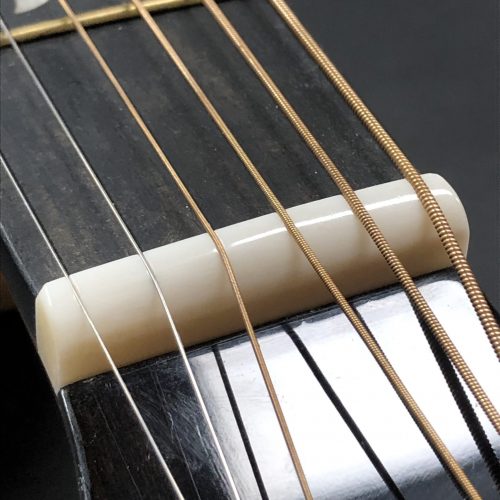
Satisfied with the finished product, we are ready to move on and tackle the needed fretwork before releasing the instrument back to its owner.

Erik Salomon - Calico Guitarworks Owner / Head Technician
Tech Talk articles are part of an ongoing effort to provide clear and detailed answers to common questions about guitar maintenance, modifications, and repairs.
While not intended as a step-by-step guide to servicing your own instrument, we hope that you will find value in the information provided.

Great Repairs Start With The Right Parts
Many of the parts mentioned in our blogs are available for purchase at:
GuitarRepairParts.com
Enter the code "TechTalk10" at checkout for 10% off your first order.
About Calico Guitarworks
Calico Guitarworks is the area’s premier destination for fretted musical instrument care and maintenance. Owned and managed by Erik Salomon, the shop is dedicated to providing quick, honest and reliable service. The staff at Calico Guitarworks has a combined 25+ years of professional guitar repair experience. Sharing the knowledge that we accumulate in this focused pursuit is at the core of what we do. Learn more About Calico Guitarworks, explore our Frequently Asked Questions, or Contact us with a specific request.

