Acoustic Guitar Bridge String Ramping
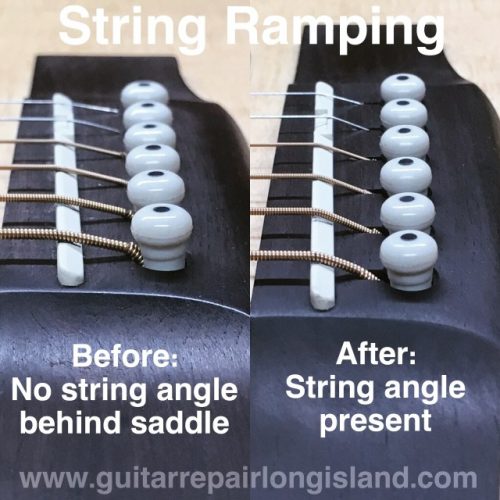
An acoustic guitar’s bridge and saddle work together to anchor and suspend the strings on the guitar body. During a setup, raising or lowering the saddle is one of the key adjustments to an instrument’s action. However, there are limits as to how far the saddle can be adjusted in either direction.
If the desired action requires that the saddle be too tall (sticking way up above the bridge), it will not have enough support to remain stable under string tension. Alternatively, sometimes the saddle must be lowered almost flush with the top of the bridge in order to achieve a comfortable string height. In extreme cases, no amount of saddle adjustment will yield a reasonable action. In this event, the instrument may require a neck reset to restore playability.
In many cases, the guitar may still be capable of being made playable with a low saddle, but experience a loss of tone and volume due to the fact that the strings have lost the defined bend behind the saddle that once held them firmly in position. String ramping is a technique that will improve the playability of guitars that have a low saddle, while not negatively impacting the instrument should it receive a neck reset and a new saddle in the future.
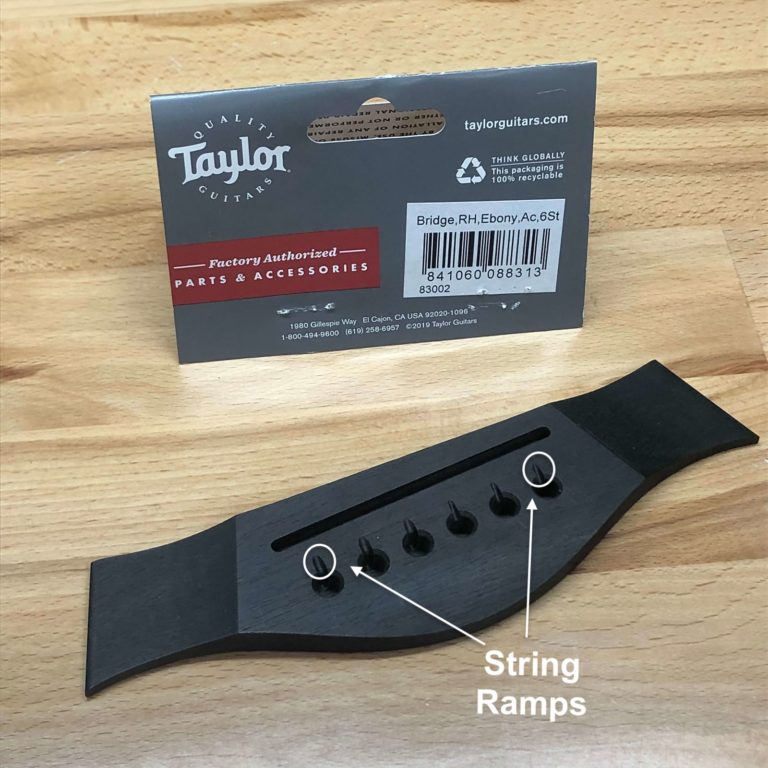
This modification to traditional acoustic guitar bridge design is so helpful that manufacturers, such as Taylor Guitars and Martin & Co. often employ it as a stock feature on their instruments.
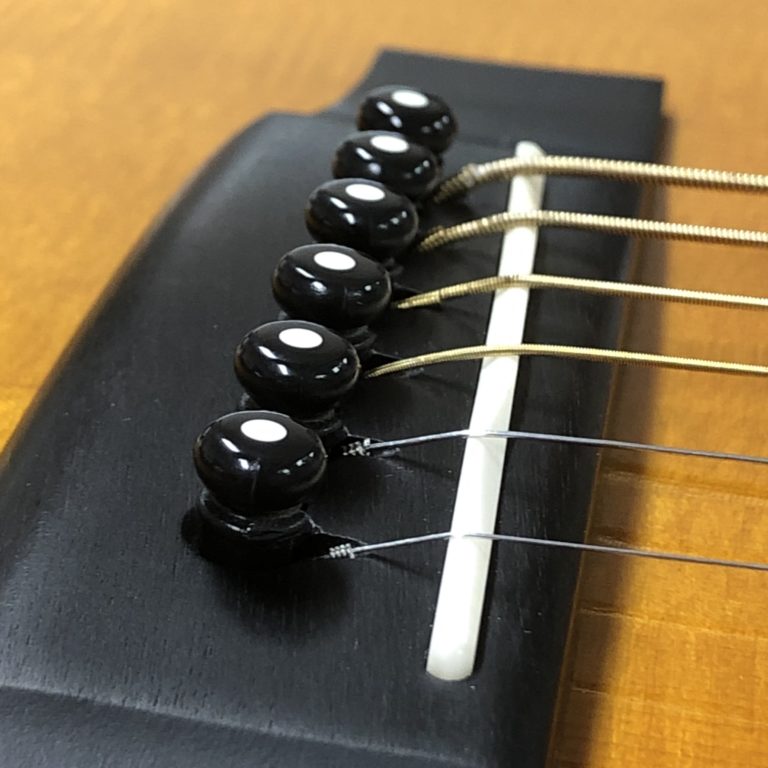
Zooming in on the photo, it is apparent that rather than just a rounded hole for the bridge pin, there is an extension off the front of each opening.
Ramping An Acoustic Guitar Bridge: Step By Step
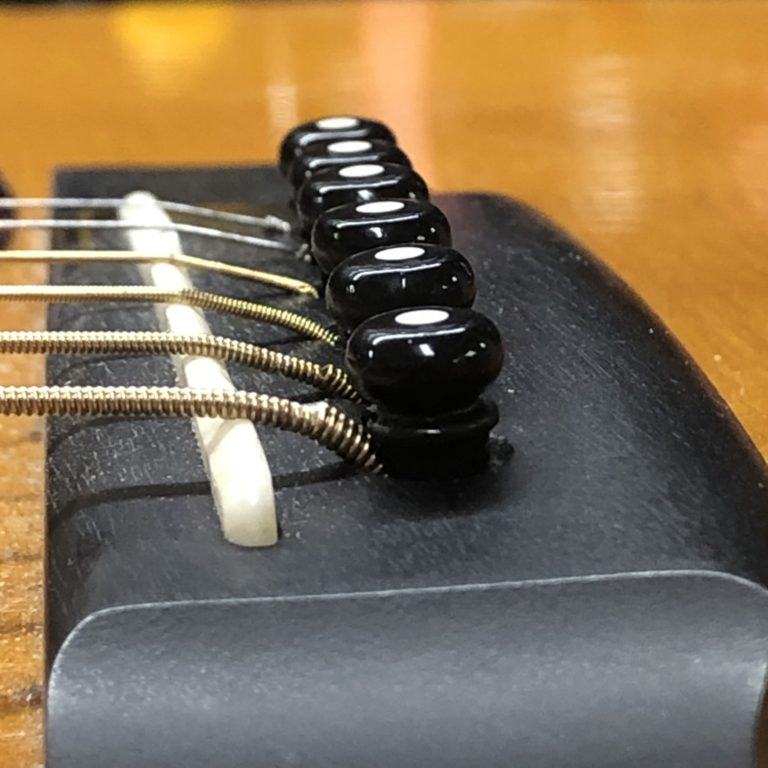
This Martin guitar came into the shop with a fairly low saddle. While the action was comfortable, we could see that the strings were hanging up on the end of the bridge pin holes, preventing them from taking a straight line toward the saddle.
The absence of a proper angle behind the saddle creates a situation where the string is able to move slightly side to side when plucked. These micro movements rob the instrument of volume and also cause the saddle to wear quicker, necessitating more frequent replacement.
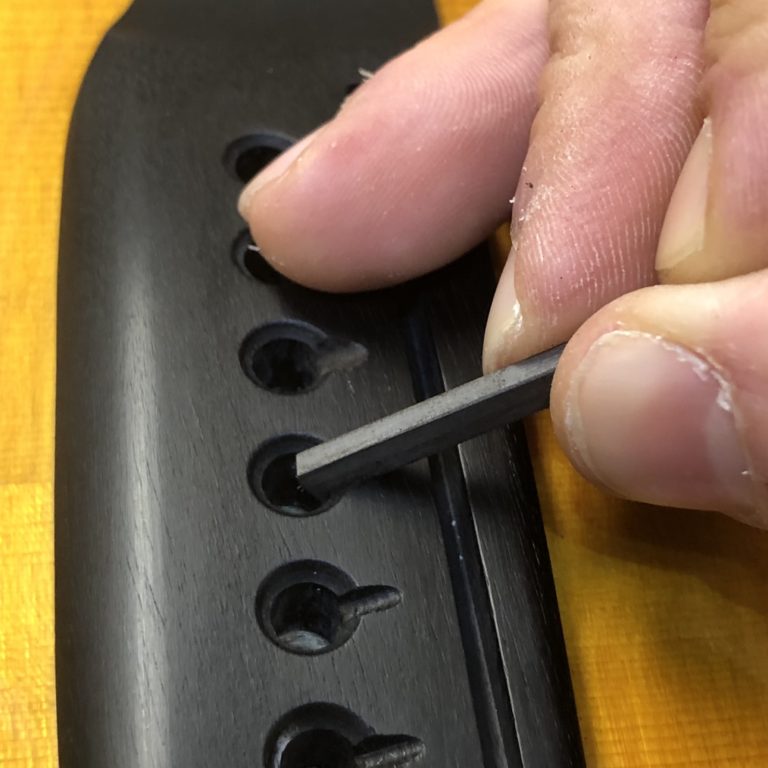
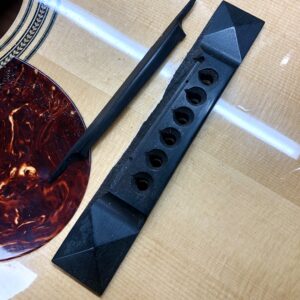
To solve this issue, using a combination of saws and files, we create small grooves on the leading edge of each bridge pin hole. These hollows create a channel for the string to pass through, unobstructed, on their way to the saddle.
While taking care to make them inconspicuous, the width and length may vary depending on the needs of a given instrument.
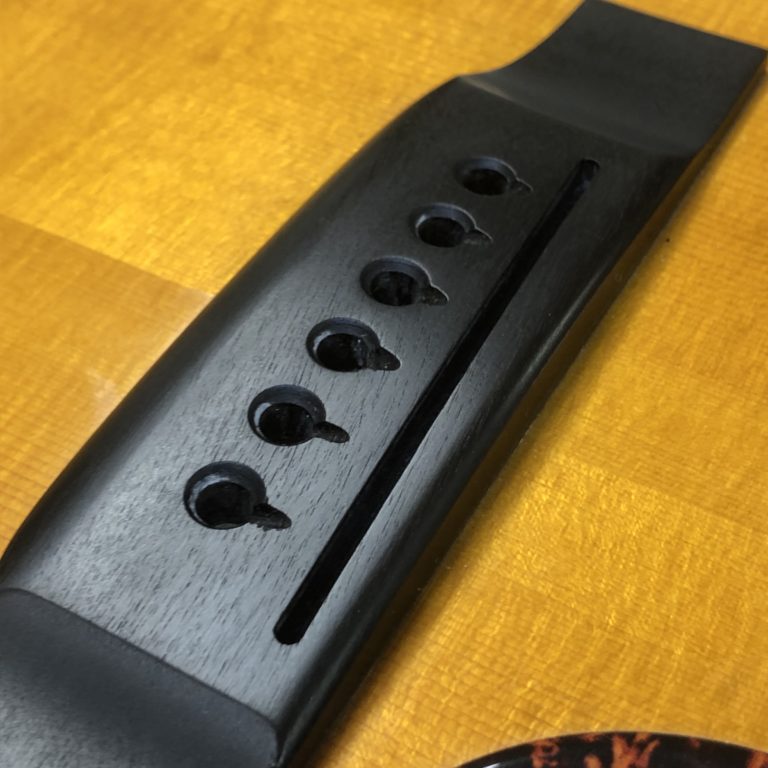
Here is a shot of the bridge with the ramping nearly completed.
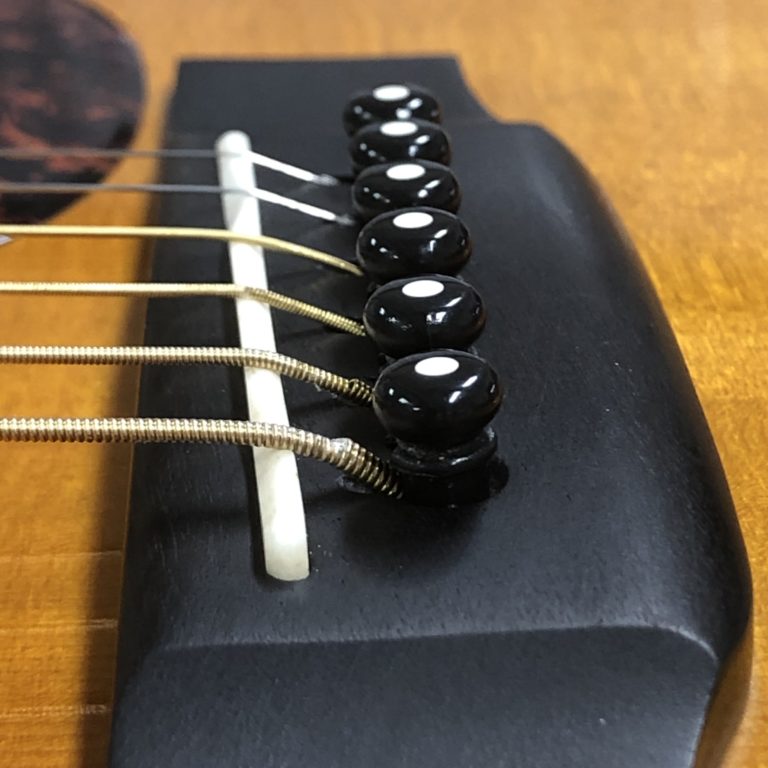
Once restrung, the work is almost unnoticeable except for that the strings are now able to make a sharper line to the saddle.
We believe that the instrument is now louder and will experience less chance of saddle damage, string breakage, and tuning issues.
Before and After From A Different Angle
Before Ramping
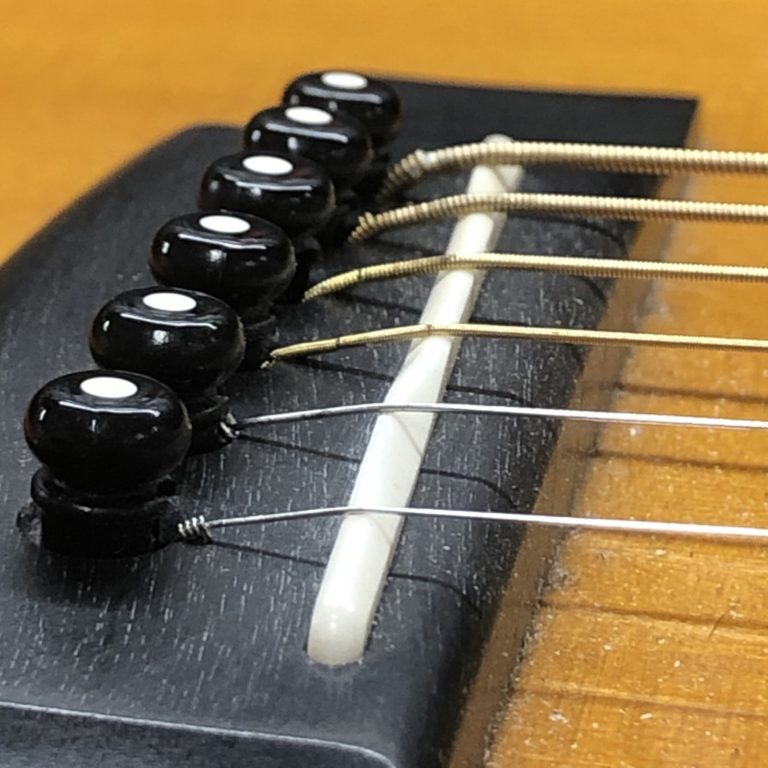
After Ramping

Erik Salomon - Calico Guitarworks Owner / Head Technician
Tech Talk articles are part of an ongoing effort to provide clear and detailed answers to common questions about guitar maintenance, modifications, and repairs.
While not intended as a step-by-step guide to servicing your own instrument, we hope that you will find value in the information provided.

Great Repairs Start With The Right Parts
Many of the parts mentioned in our blogs are available for purchase at:
GuitarRepairParts.com
Enter the code "TechTalk10" at checkout for 10% off your first order.
About Calico Guitarworks
Calico Guitarworks is the area’s premier destination for fretted musical instrument care and maintenance. Owned and managed by Erik Salomon, the shop is dedicated to providing quick, honest and reliable service. The staff at Calico Guitarworks has a combined 25+ years of professional guitar repair experience. Sharing the knowledge that we accumulate in this focused pursuit is at the core of what we do. Learn more About Calico Guitarworks, explore our Frequently Asked Questions, or Contact us with a specific request.

